


In engineering scenarios such as mining, tunneling, and construction pit construction, the term "anchor bolting" is often heard. It's more than simply drilling a hole and inserting a bolt; it's a critical reinforcement technology that actively constrains deformation in the rock and soil through force. Known as the "invisible reinforcement" of geotechnical engineering, it plays an irreplaceable role in ensuring project safety and improving structural stability. Let's discuss the anchor bolting procedure.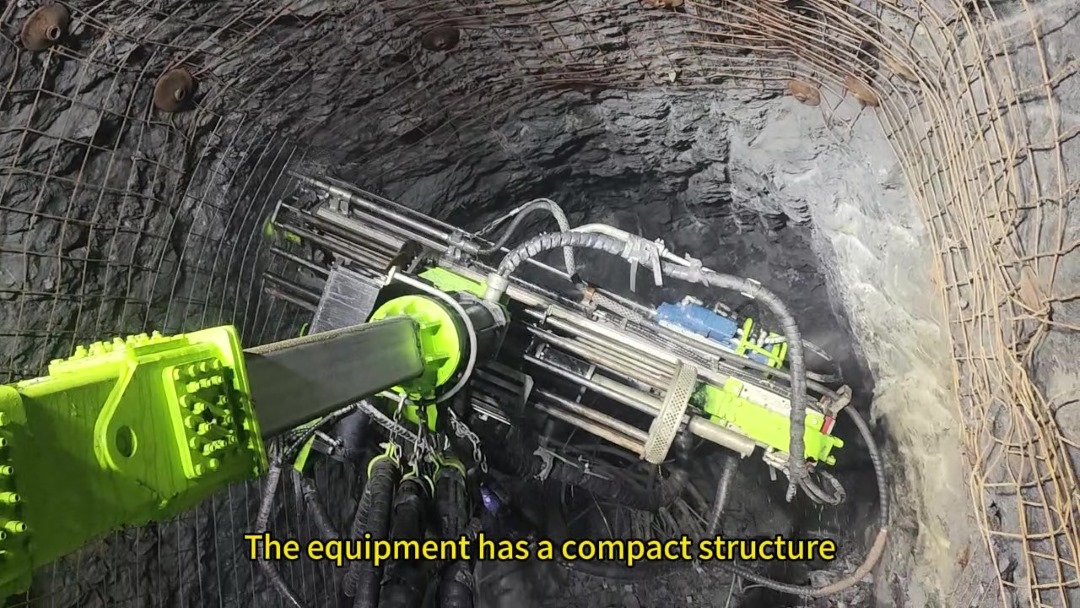
Anchor bolting is a delicate process that requires strict adherence to procedures; failure to adhere to these procedures can compromise the reinforcement effectiveness. The common steps are as follows:
① Preliminary Preparation: First, survey the rock and soil properties (such as hardness, crack development, and moisture content), determine the anchor bolt type (metal, fiberglass, or resin), length, diameter, and spacing; prepare construction equipment (such as an anchor drill, grouting pump, and anchoring agent mixing device), materials (anchor bolt body, grouting fluid, and anchoring agent), and clear debris from the construction surface.
② Drilling: Use an anchor drill to drill holes at designated locations according to design parameters. Drilling requires precise control—the hole diameter should be slightly larger than the anchor diameter (typically 10-20mm larger to facilitate grouting or anchor installation). The hole depth must meet design requirements (generally 50-100mm longer than the anchor length to allow for anchoring space). The drilling direction must align with the load-bearing direction of the rock and soil (for example, anchors on foundation pit slopes should be angled downward, forming a 15°-30° angle with the slope).
③ Hole Cleaning: After drilling, use high-pressure air or water to remove rock debris, dust, and accumulated water from the hole. Any debris left in the hole can affect the bond between the anchor and the rock and soil, leading to anchor failure. Therefore, this step is crucial for ensuring construction quality.
④ Anchor Installation: Select the installation method based on the anchor type. For mechanical anchoring, the anchor rod is pushed into the hole, and the anchoring mechanism is activated using a specialized tool (such as an expansion shell) to secure the anchor. For grouting, the grouting tube is first inserted into the hole bottom, then slowly withdrawn while grouting (ensuring that the grout completely fills the hole), before the anchor rod is inserted to avoid voids.
⑤ Curing and Testing: Grouting anchors require waiting for the grout to solidify (typically 7-14 days, depending on the grout type and ambient temperature). The anchor strength is then tested using a pullout test—a pullout test is performed using a pullout tester. If the anchor strength meets the design value, the installation is satisfactory. If not, re-anchoring is required.
Anchoring may seem like a simple "drill a hole and insert a rod" operation, but it is actually a systematic process that integrates geotechnical mechanics, materials science, and construction technology. Like the "reinforcement guardian" of geotechnical engineering, it plays a key role in ensuring project safety, promoting underground space development, and preventing and controlling geological disasters. With technological advancements, new anchor bolts (such as carbon fiber anchor bolts and self-drilling anchor bolts) are constantly emerging. Bolting technology is also moving towards greater efficiency, environmental friendliness, and intelligence, providing stable support for more complex projects.

Anchor Bolting Procedure Analysis
2025-09-15 Visits:
Previous